
So first, a tutorial on how I made my paper roses from yesterday. I've never done a tutorial before so I hope this is ok. I decided not to do a video one as I always end up start/stopping the ones I watch to catch up on every step. I decided to do mine as a step by step with photo and instructions.
One thing to remember is that nature isn't perfect, so why should handmade flowers be either? If one petal is slightly wonky, it really doesn't matter, I think they look great anyway.
So here we go...
1. Cut 4 circles from your chosen paper. Remember whatever size you do them, the rose will end up slightly smaller all around because of the curling. I've done mine at 2" diameter.

2. Take one of the circles, fold it in half.

3.Fold this into thirds - remember it doesn't have to be perfectly perfect!


4.For the sake of this tutorial I have drawn the petal line, but I would normally do this freehand. Cut this out.


5. Cut the point off.

6. Open it up and it should look like this...

Do this to all 4 circles.
7. Curl your petals - I used a cocktail stick.

9. On one circle, cut one petal out.

10. On the second circle cut a section of two petals out. On the third, three petals out.


11. You should then have a full flower, a 5 petal piece, a four petal piece, 2x three petal pieces, a two petal piece and a one petal piece.

12. You only need one of the three petal pieces, so the one you are discarding, cut one petal to use as your base and throw away the rest.

13. You now need to glue and seal your 5, 4, 3, 2 and 1 petal pieces...


14. Put your glue gun on to warm up NOW :-)
15. Put some glue on your base petal and fix your full flower to it.


16. Now add some glue from your glue gun and place your 5 petal piece on top. Remember your petals should ideally be between the layer below, not in line. You'll have to be quick getting the placement right with glue gun glue as it goes off so quickly.


17. Using your glue gun, continue adding your layers, the next one is the 4 piece, then 3 piece, 2,1...

18. When you've put all your layers in, remove any strings of glue that are showing. Play around with the curls if you're not happy.
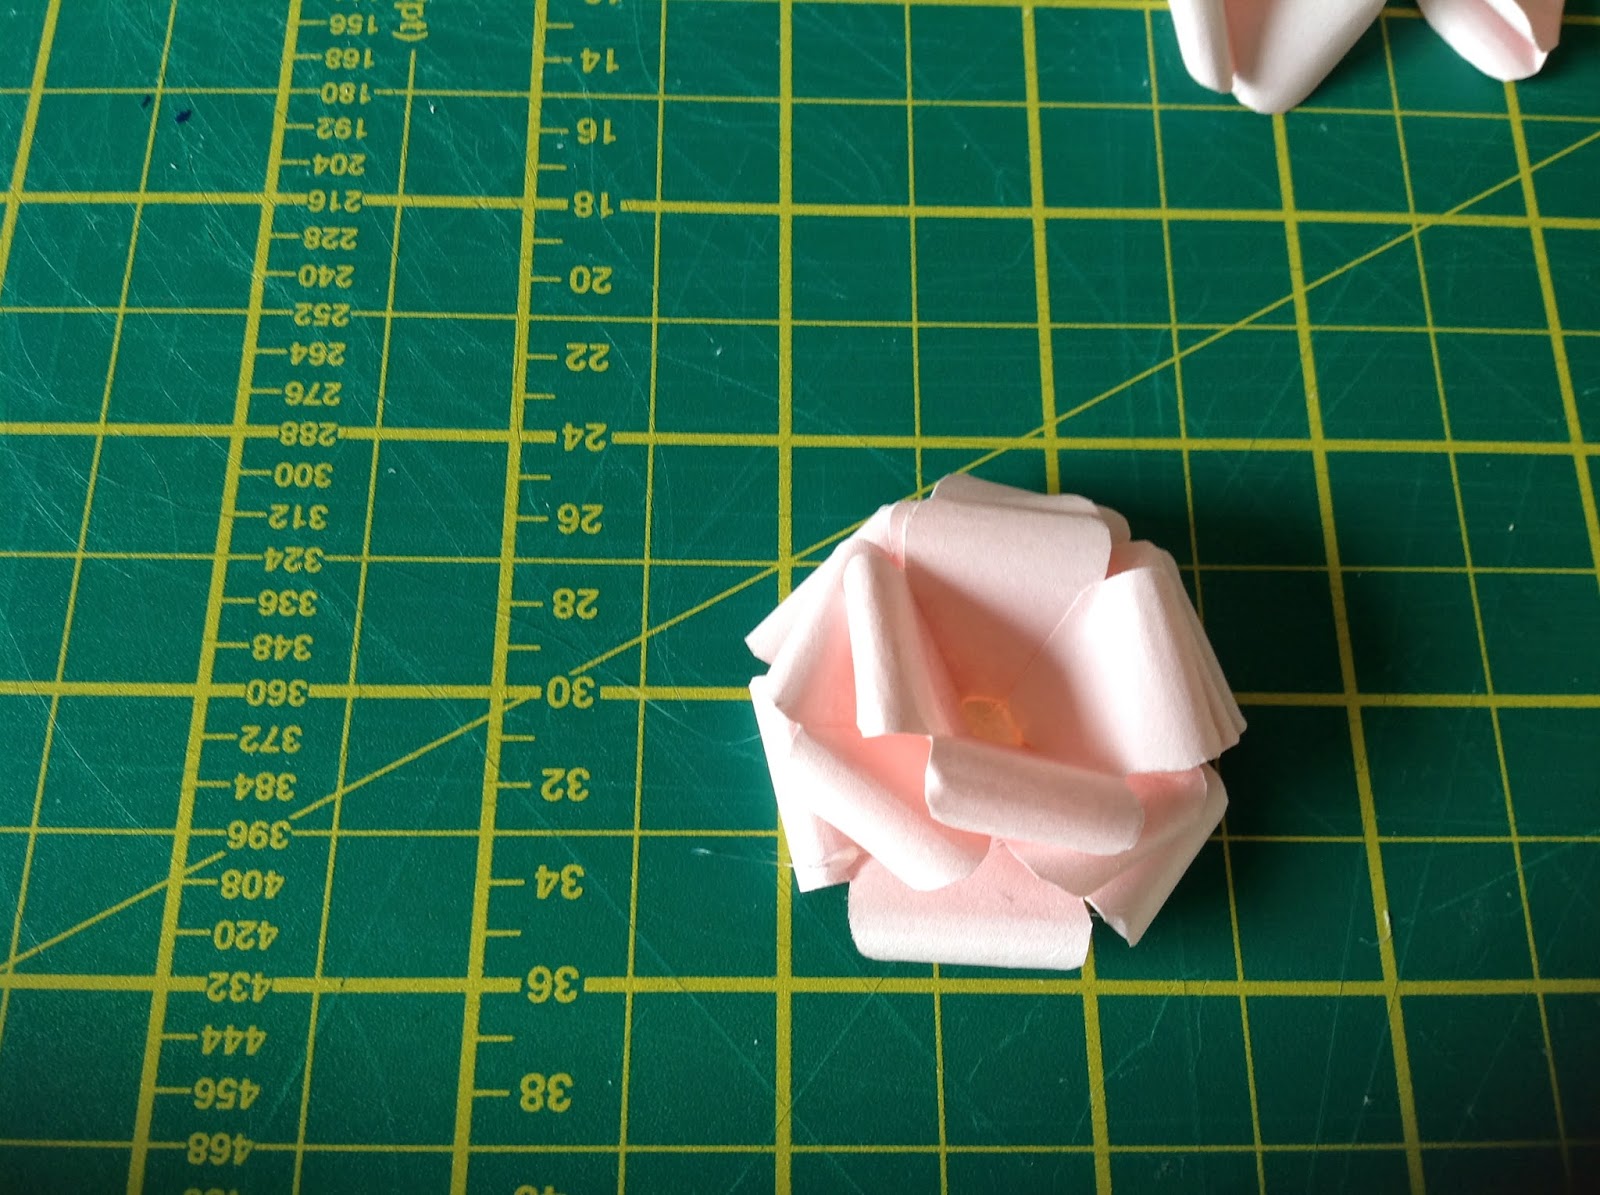
Your finished Product...


Hopefully that was ok as a tutorial, I would really welcome your feedback. If you have any questions or queries, please get in touch, I'm happy to help.

very explicit and good pictures. Well done.
ReplyDeleteThank you for your lovely comment. It was a bit nerve wracking as I haven't done a tutorial before!
DeleteThanks so much for this, will give it a try...luv Ursula...x
ReplyDeleteThank you for your lovely comment x
DeleteThat was so simple to follow and great pictures cant wait to try them
ReplyDeleteThanks Kath much appreciated brilliant tutorial.
ReplyDeleteThankyou so much for this tutorial, ive made my first paper roses today. It took a while because of my hands, but i think there not to bad.lol. thankyou again. I hope you do more flowers.xx
ReplyDeletehi
ReplyDeletebrill demo, made my first rose, looks lovely-thankyou
Thank you for the tutorial, they look gorgeous. Can't wait to try them xx
ReplyDelete